Thursday, July 29, 2010

The Locavore Way

If you've been reading my blog for a while, you know how much I support local farmers and gardening. In earlier posts (here and  here), I offered suggestions for planting vegetables with kids (A reader recently told me she planted lettuce in a window box after reading my post. I hadn't thought of that. Great idea!) I also shared stories about our garden successes (here, here and here ). Joining CSA's or visiting farmer's markets has also been discussed on this blog by me and others.


By patronizing farmer's markets, you can meet the people who grow your food, meet your neighbors, and support local agriculture and the economy. By bringing your children to the market, you help them learn that produce does not come with stickers on it or in plastic bags. If you and your children interact with the farmers and other vendors, they can learn about life cycles, farming in general, and economics, to name a few subjects. Many times, the farmers at farmer's markets will welcome you to visit their farms and some encourage volunteer work in exchange for fresh produce. This is "Mucking about and meeting the locals" at its best.


Just this week at the ORR Farmer's Market, I talked to Zack from Lucky Field Organics who encouraged me to try kohlrabi. He suggested several ways to prepare it before sending me on my way with my purchase. I took mine home, peeled it, sliced it thin, and cooked it in a cast iron skillet in a little olive oil. The only seasoning was a little salt and pepper. Even though I need to perfect my cooking technique, my son still loved it! Next week I'll buy another one and use it in an Asian style slaw also featuring a lovely savoy cabbage from our garden. If Zack had not suggested kohlrabi and offered cooking tips, I would not have bought it. This is the kind of service and interaction you can expect from a farmer's market.


For those of you who are new to the idea of being a "locavore" (someone who seeks out and savors locally grown and raised food), I recommend The Locavore Way by Amy Cotler as a great place to learn more about this endeavor. She offers practical tips for getting started, including a point I've made here: start small and add a little bit at a time. If you can attend one farmer's market this year and purchase produce for one great meal, that's terrific. If you belong to a CSA or have a small garden, great. But don't think you need to be like Barbara Kingsolver and become a complete locavore (Her book about a year of eating locally, Animal, Vegetable, Miracle: A Year of Food Life is a great adult read). As much as I strive to eat locally, the truth is I'm not a "full-time" locavore.  Being a locavore in the Northeast is hard during the winter and spring. And then there are the things I'm not willing to give up such as coffee, or chocolate, or even the occasional mango). I eat more locally than some but not as much as others and that's Ok. Find the amount that's right for you right now and keep looking for ways to support your local farmers, bakers, beekeepers, etc. It's good for your family's health, the planet's health, and the local economy.


Here's a  quick recipe for this time of year.
(If you're fairly skilled in the kitchen, it truly takes 30 minutes from start to finish. If you involve your kids in the cooking, as I suggest, it will take longer!)

Fresh Tomato Sauce over Pasta
Ingredients:
An assortment of tomatoes. This week we used cherry tomatoes and a variety of others we purchased at the farmer's market (I used one small box of cherry plus 5 larger tomatoes. Cut cherry tomatoes in half and cut the other tomatoes into bite-sized chunks.)

An onion or two, sliced thin
Chopped garlic (I used 5 cloves, but we LOVE garlic)
fresh basil leaves, torn or chopped (I used roughly a cup, maybe more)
salt and pepper to taste
Olive oil to saute the onions
grated Parmesan or Romano cheese (optional)
your favorite pasta

With fresh ingredients, it's almost impossible to mess this up, so don't worry about exact measurements.
Procedure:
  1. Put the pasta water on to boil.
  2. Heat a large skillet over medium heat. Add a couple of tablespoons of olive oil to the skillet. When the oil shimmers, add the onions. Saute them until nearly soft. Then add the garlic.
  3. Cook the garlic for 2-3 minutes, then add the tomatoes.
  4. About this time, put the pasta into the boiling water.
  5. Simmer the tomatoes, onion, and garlic over medium-low heat until the tomatoes are soft (roughly 10-15 minutes), adding half the basil about 5 minutes in and the rest at the end.
  6. Salt and pepper to taste (likely very little, if any will be needed)
  7. Drain the pasta. Serve the pasta with the sauce and a sprinkling of grated cheese, if desired.
Add a nice green salad or maybe a focaccia from your local baker and you've got a delicious meal.


Are you a locavore? If so, what region or country do you live in? Are there times when eating locally is harder for you (such as winters here)? If you're not a locavore, would you consider trying to eat more locally? What roadblocks might you face? How might you work through them?

Where's Michelle?

Before I get to writing a new post, I want to apologize to my regular readers for my absence lately. I know many of you look for my posts and have probably been wondering what's going on.

This blog isn't meant to be a place for my personal stories, so I'll keep my explanation brief. A couple of weeks ago, I suffered an injury that has prevented me from working at my computer long enough to blog. (I have, however, drafted at least 4 posts in my mind... I just have to write them up). I'm on the mend now and expect to be back with a new post soon- perhaps by tonight.

Thanks for your patience.

Sunday, July 11, 2010

ORR Farmer's Market

Between the July 4th holiday and the summer cold making it's way through my house, I haven't been able to post for a while. I will be back soon.

Until then, for my local readers, please remember to stop by the Tri-Town Farmer's Market from 3-7 pm every Tuesday at the Old Rochester Regional High School complex. Support your local farms and talk to the farmers about how your food was grown. Go in the main entrance and take a left. You can't miss it.

Last week, the market featured several local farms, (including Cervelli and Lucky Field Organics) a local bakery (Artisan Kitchen), a jewelry maker, a musician, and a "canteen" trailer selling hot food. There were others there but I forgot to note their names so I could share them here. I'll edit this post once I learn the names of the other weekly vendors. The Market Manager also told me she's working to locate other venders, so others may be there soon.

Update July 13th
Today's list of vendors:
Lucky Field Organics from Rochester
Cervelli Farm from Rochester
The Artisan Kitchen from Rochester
Franky's Franks- Organic, Natural, and Kosher Dogs
Green Knoll Designs (jewelry and clothing for little kids)
Great Cape Bakery from Marston's Mills, MA
Trip's Farm  from Westport, MA and Little Compton, RI
Christine's Flowers from Rochester
With music provided by Andrew Prete

Sunday, June 27, 2010

Garden Progress

Our garden is growing beautifully this year. Unlike last year's terrible weather (during the month of June we had something like 26 days of rain), this year's has been perfect. We've harvested loads of lettuce, kale, and pea pods already. One jalapeno pepper plant already has a tiny pepper growing and the zucchini have set flowers which means squashes won't be far behind.

Here's a view of the garden taken early this evening:

In the left front corner, behind the fence, is the zucchini. Working toward the right you see parsley, then broccoli and red onions. In the back left corner is the cabbage. Pea pods are straight ahead being picked by my daughter with tomatoes to the right of that. (My kids eat more pea pods raw, right off the vines, then they do cooked). In the middle bed is the post with the hummingbird feeder I wrote about last time. Pole beans have just popped out of the ground and will soon be winding their way up the pole. Around the pole beans are peppers, eggplant, and marigolds. Outside the fence is lined with various flowers- marigolds to deter pests, cleome and cosmos to attract butterflies and hummingbirds, and on the north side (behind the pea pods), sunflowers to attract birds in late summer. In the far back left of the photo, against the building, is our cold frame. We grew arugula and rosemary until mid-December last year, but I need to learn more about maintaining produce all winter long.

I'm thrilled with the results so far, but I want pause to tell you that we have been working on this garden for about 5 years. Our first year was a disaster- the seeds were washed away in heavy rain and rabbits ate all the plants we put in during one night. We gave up that year- we had a young son and it was too much to redo everything. The next year we got smart- built inexpensive raised beds and put a cheap fence around the whole thing. We had more success. Then we put in a real fence with a gate and added more compost to the beds. Terrific success. Then last year... virtually nothing was productive except the basil. It was a bad year.

My message... start small and add to your successes. If you planted a small garden, or in some pots, and had success this year, build on it. If things didn't go quite so well, as with our first year, take a step back and plan for how you'll improve next year. Take baby steps. You know the old saying: Rome wasn't built in a day! It's easy to get caught up in trying to do everything all at once. Cut yourself some slack and celebrate each step you take toward growing your own produce.

Here are some close-ups of the produce:


Cabbage

Eggplant

Romaine Lettuce

Pea Pods


How are your gardening efforts going? Some of you left comments that you were planting this year. Others told me in person. Please share your successes with us. What challenges are you facing?

Wednesday, June 23, 2010

Hummingbirds

A relatively easy way to bring wildlife to your yard or apartment window is to get a hummingbird feeder. There are many styles of feeders available. Ours hangs from a branch in the middle of our vegetable garden, but you can hang them from plant hangers right outside your windows, as well. You can also get ones that stake into the ground or suction cup to windows if you don't have a place for a hanger. A quick Internet search will reveal the hundreds of options available, but I recommend taking a trip to your local garden center to find one. The folks who work there will likely be knowledgeable about local hummingbirds and will be able to help you choose the feeder that's best for you. If you want a fancy hand-blown glass feeder, you can also find those in local gift shops.

Most experts recommend setting feeders up by mid-May here in New England, so you may not get any visitors if you do it now. You never know, though. I only set ours up last weekend and the steady flow of hummers started a day later. If you live in another part of the country or overseas, the feeding times will likely be different than here. In tropical areas you can feed them year-round. At a year-round feeder in Ecuador, a hummer landed on my finger when I stood very still nearby.

Kids love to watch these tiny birds zip around the yard and dip into the feeders to eat. Once hummers start visiting your feeder, your kids will be able to notice patterns in their feeding times. Challenge them to predict when the birds will come. I snapped my photos yesterday by sitting very quietly around the time when I knew the Ruby Throated Hummingbirds would arrive. Sure enough, minutes later, there they were.

If your kids are also inclined, they could start keeping a nature journal in which they record how many hummers they see, when they see them, how long they stay, what flowers they visit etc. (FYI...Hummers are especially drawn to red, tube-shaped flowers. Planting those in your garden will increase your hummingbird visitors. In our yard, cleome, and later trumpet vines, are the big draw). Artistically inclined kids can do their best to draw them. If the birds move too fast to draw, ask kids to draw the hummers' flight patterns using squiggly or dotted lines. Encourage linguistic learners to write poems or descriptions of the birds. More active kids can emulate the hummers quick movements with their bodies or create a dance that represents their movements. Have a musician on your hands? Have him compose a short song that captures the feeling of the hummers' movements. The possibilities are endless. Break out of the traditional school-like kind of responses and have fun!

By watching closely over a period of time, kids can make their own inferences about hummingbird behavior and then supplement their learning with books or articles. I strongly encourage you to let your children explore, observe, and make inferences before you go to "expert" resources. I am a writer, so I value books tremendously, but this blog focuses on "mucking about" to learn things on your own, first, after all! When you are ready for more information, here are some books you might try:


Do any of you have hummingbird feeders? Where do you live? Have they been active this year? Do you know what species you've been seeing? What strategies have you found work for attracting them to your yard? Do you have a book to recommend? Please share.

Thursday, June 17, 2010

Loose Parts Play in the Inner City

In April, I blogged about the importance of "loose parts" play and offered practical suggestions for ways incorporate more "loose parts" play into your children's and students' lives.

I recently learned of a wonderful new natural playground at the Crispus Attucks Children's Center in Boston's inner city neighborhood of Dorchester that provides a safe, natural place for kids to play. While the people involved in the creation of the playspace didn't specifically use the term "loose parts play" in their interviews, that's exactly what this playground provides. You can listen to a story about it here and read more here.

Do any of my readers live in the Dorchester area? Have you visited this playground? What more can you tell us about it?

For readers who don't live in the Dorchester area, do you know of a similar playground in your area? Are any of you involved in planning a new playspace like this? Many people are part of this movement. I'd love to share other examples here. (If there's a website, please provide the link, too).

I know I have regular readers from the UK, Canada, France, Morocco, and India. Are there playgrounds like this in your countries?

Friday, June 11, 2010

Art and Nature with Children

Our yard has been an explosion of color over the past few weeks with more and more flowers blooming each day. Last week, I decided to take advantage of the flowers and put my kids to work creating beautiful artwork for our walls. You can do the same, for a relatively small amount of money, and get a lasting piece of art in the process.
Here's what you need (All supplies found in art/craft stores and even some large discount stores):

  • Pre-stretched canvas  We used  16"x 20," but they come in a variety of sizes. I got 2 for $5.99 on sale.

  • A set of brushes in a variety of sizes (I purchased a rather complete set that included a roll-up canvas storage case for $4.99 on sale. You can get smaller sets for $2.99).

  • Acrylic paints in a variety of colors. All you really need is the primary colors- red, blue, and yellow- plus white and maybe black. Let your kids have fun mixing the other colors. They'll love it! (I purchased "student" acrylics on sale for $3.99 per tube).

  • Newspaper to protect your work surfaces.

  • A surface/container on which to mix paint. We use tin foil.

  • A small container for water. We use margarine or cream cheese containers.

  • Smocks to protect your kids' clothes. We use old adult sized T-shirts- they cover everything!

  • If you're inclined- samples of artists' renditions of flowers for inspiration. We used a copy of Georgia O'Keefe 100 Flowers. I happen to love her flower paintings.
Here's what we did:

  1. We took a quick look at the book of O'Keefe's work and then put it away. I wanted her art to inspire them to make large paintings, but didn't want them to copy her work. We spent no more than 5 minutes on this.

  2. Each child chose a flower to paint. We happened to work in the porch, but you could also set your children/students up outside in a garden, with an easel, if you so choose. Mine preferred to work on a table. (When I did this in my classroom, I arranged vases of flowers on groups of desks and used sturdy paper instead of canvases).

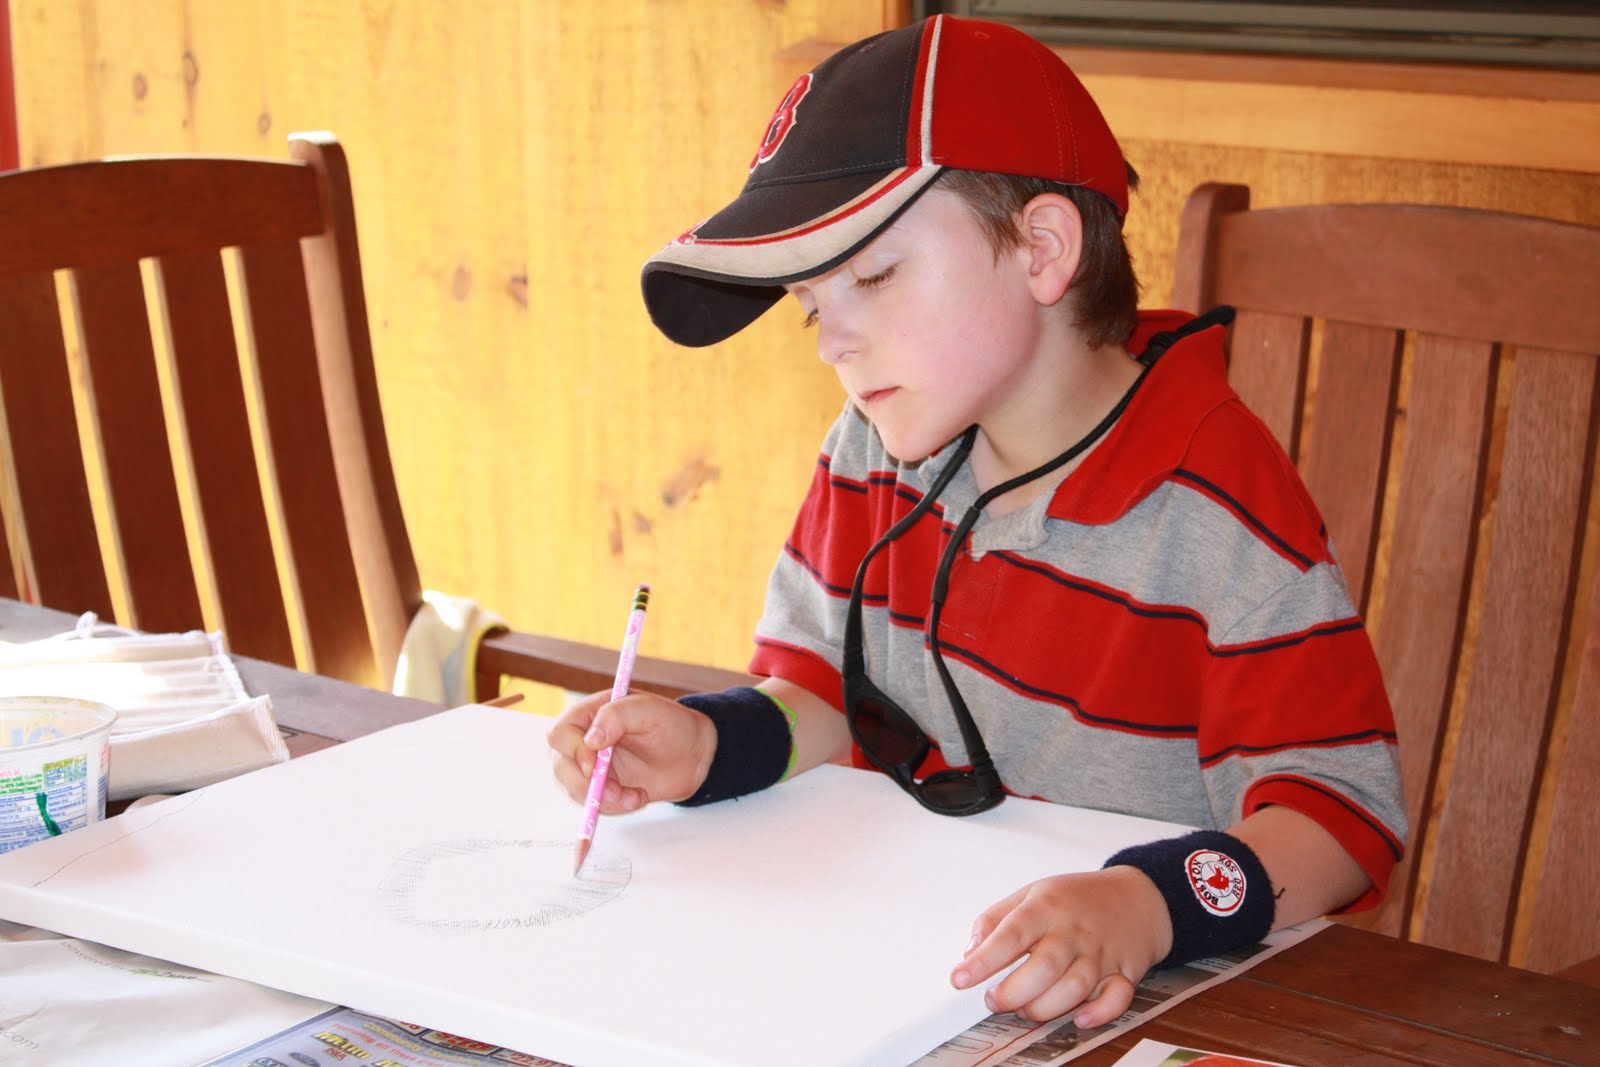
  3. Each child chose how to begin. My son preferred to draw the basic outlines with pencil first.
        My daughter wanted to launch right in with the paint.

4. I helped squirt the paint onto the tinfoil and then let them go. Here's the hard part... the best thing you can do to encourage a kid's inner artist is stay out of it. If they need help mixing colors, offer some guidance, but don't even touch those brushes to the canvas! Kids create the most wonderful, free art that captures the spirit of an object when left on their own. If they ask for help painting, tell them they're the artists and encourage them to paint their vision.

Here's what they made. Neither one looks exactly like the poppies they chose to draw, yet they are lovely, vibrant representations of the flowers my kids saw every day for about a week.


My 4 1/2 year old daughter's painting

My 8 year old son's painting

The great thing about pre-stretched canvasses is that as soon as the paint dries, you can hang them on the wall. I spent a total of  about $31.00 and have two beautiful pieces to decorate our home. Plus, the brushes can be used over and over and we still have plenty of paint for even more creations in the future. Gift idea... Father's Day is just around the corner... grandfathers and dads usually love to receive art made just for them. My husband proudly displays the canvases they made for him last year.

Would this idea work for your family or classroom? Do you have any great tips for combining a love of nature and art? Please share your thoughts.